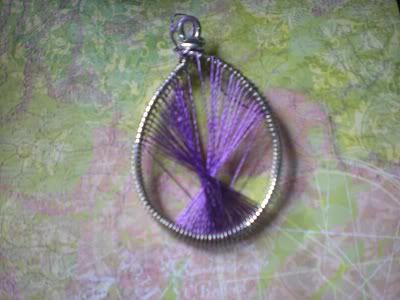
Its finally complete! if you have questions feel free to comment or leave message on my fanpage.
How to Make String Art Earrings
Project Materials and Tools
Pliers Roundtip and Clippers
Bamboo Skewer or Coiling Tool
12 gauge wire
26 gauge wire
1-2 colors Embroidery Floss
Ear wires

Step One : Cut atwo five to six inch pieces of 12 gauge wire and form into a tear drop , with one side longer than then other.

Step Two: Take your bamboo skewer or coiling tool and coil about 1-2 foot of 26 gauge wire. repeat this step for the other earring.

Step Three: Remove the coil from the skewer and open it by pulling apart from itself some. Take the open the coil and insert the the end of the teardrop frame. Slide your coil around the frame and clip off leaving enough to wrapping to close it off.

Step Four: Bend the short of the Tear drop for the top into loop and wrap the longer piece around the bottom of the bent loop and clip off the excess. Also the pieces of coil at the can now be wrapped around the base to secure them.

Step Five: Separate one strand from your embroidery floss it will need to be long, the one with little bit of satin finish or sateen look the best for this project. Tie it the top of your tear drop then bring the string down to the middle coil you could count the coils or eyeball it.fromthe middle move back forth looping the top coils, this should start to cover the top part. of your earring. Once you are halfway down on both sides bring the string back to the top and tie off, leave the tail until your finished.
** If using only one color thread move in a circular pattern until the whole piece is covered.

Step Six :Take the second color thread a the top one again go back down the middle. This time loopthe thread around coil next to where your over strung part leaves off. Repeat until both sides are covered. Then take all tail threads and tie them off at the top clip them our wrap around your base.
Step Seven: Add Ear wires to the top and you are finished, you can also embellish with beads so on so forth.
This Tutorial is For personal use only, Enjoy!

No comments:
Post a Comment